GIT Staging: In the last tutorial, we learned how to create a new git repository for our project. Now it’s time to start working with that repository! The git project is mainly 3 parts, and that is:
Lets us know about the above 3 parts of the Git Project.
| Post On: | GIT Staging |
| Post Type: | GIT Tutorial |
| Published On: | www.softwaretestingo.com |
| Applicable For: | Freshers & Experience |
| Get Updates: | Join Our Telegram Group |
Working Directory: It is a directory on your computer, also called a local repository, where you will store all of the files for your project. You can create, edit, delete, and organize these files on your computer.
Staging Area: This is where you can list the changes you have made to the working directory. You can also call it a Tracked Local Repository.
Repository: When we mention repository, that means you are talking about the remote repository. Git permanently stores changes as different versions of the project, which helps keep track of all modifications made to the codebase.

GIT Staging Commands
In this blog post, we will work on a local repository and try to track / untrack the changes of a file by using the Git commands. So for this, we are going to take the help of the below GIT commands:
Before we can use the commands above, we need to have some files in our git repository project. So, let us create some files in your project directory.
Git Status Command
The git status command is very important as it gives you information about the current state of your repository. For example, it will show you a list of files that have been changed, any changes that have been made to the staging area, any untracked changes on your local machine, and also information about what branch you are currently on and how many changes you have in your working directory.
Staging Area: A staging area is a place where Git stores all the changes that you want to include in your next commit. It’s like a holding area for everything that you’ve changed since your last commit, and it lets you decide what goes into each new commit. Changes can be anything that can be a file, part of the file, or a single line in the file.
Untracked Changes: Untracked changes are changes that have been made to the local directory that have not yet been pushed to staging.
Tracked Changes: The changes or files that are in the staging area are known as tracked changes.
Now, let’s practice so that we can easily understand the discussion with less text.
- Create a Directory
- Right-click inside the directory
- Click on Git Bash Here – enter the command git status and hit enter.
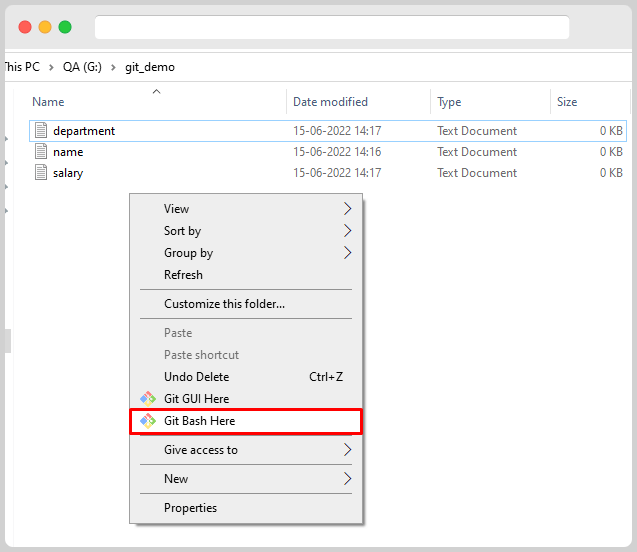
Now Execute the command git status.
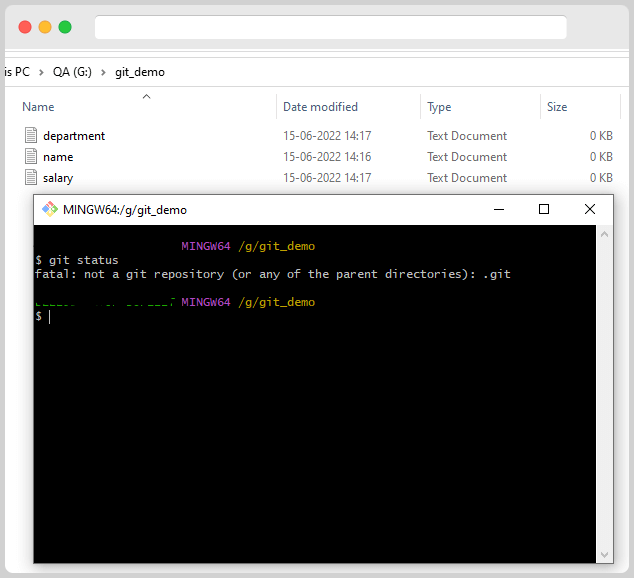
Here, you can notice if you run the git status command outside of a git repository, then you will get the error message like the one below:
$ git status
fatal: Not a git repository (or any of the parent directories): .git
Now let us try to Execute the git status command inside a git repository.
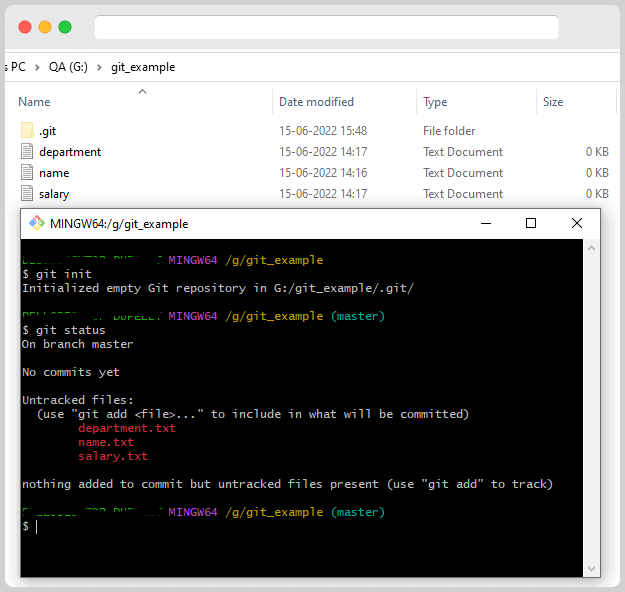
The “git status” command displays the appropriate
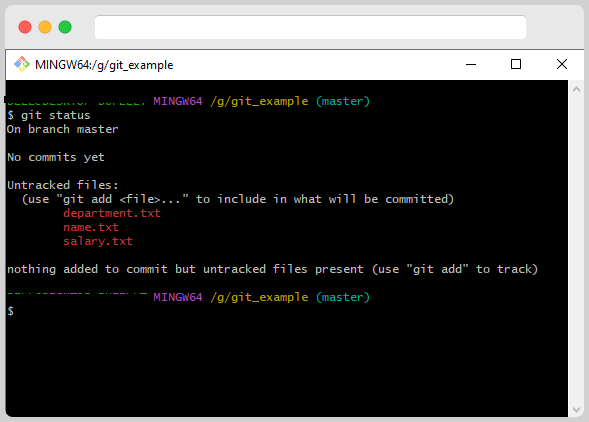
te response after running “git init.” It shows that you are currently on the master branch and have not made any commits yet. Also, if there are some untracked files, it also notifies about them.
If you see untracked files in your repository, that means git is not aware of any changes to those files. You can tell git to start tracking changes to those files by using the “git add” command.
Git Add Command
The git add command moves changes from the working directory to the Staging Area. This lets Git know that there are updates that the user wants to commit. It’s important to note that this doesn’t affect the remote repository because changes aren’t actually recorded until you run the git commit.
Let’s begin by adding a single file to the staging area. To use the git add command, simply type git add <filename>. You can also use the git status command to see what information git has about the current state of your repository.
Before Executing the Git Command
After Running the GIT Add command
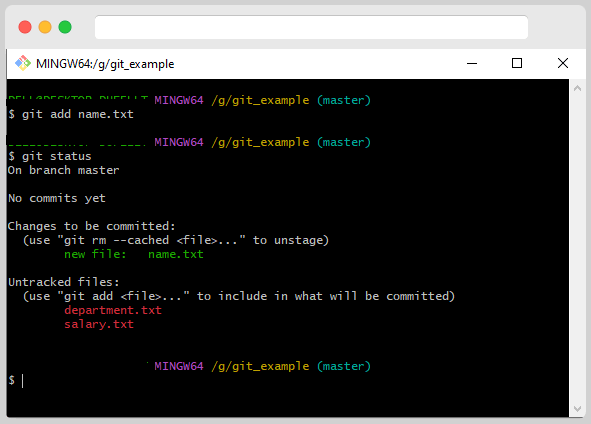
First, you can see that the information we are seeing is different. When we added a new file, it was untracked at that time. However, after running the “git add” command, the file status changed to “changes to be committed.” This is also referred to as a file being staged for commit or in a staging area.
Adding Multiple Files to Staging Area
If you have multiple files to add, git add will easily stage all of them by using git add <file1> <file2>.
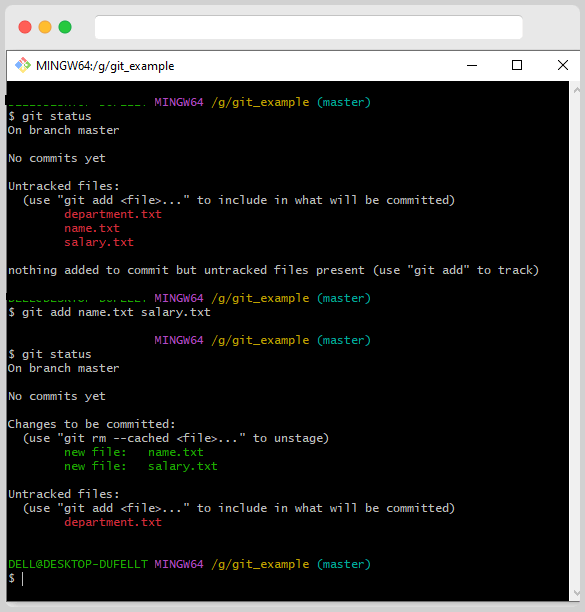
Add all the changed files to Staging.
If there are many files that need to be added, they can all be added at once by using the command “git add *.”
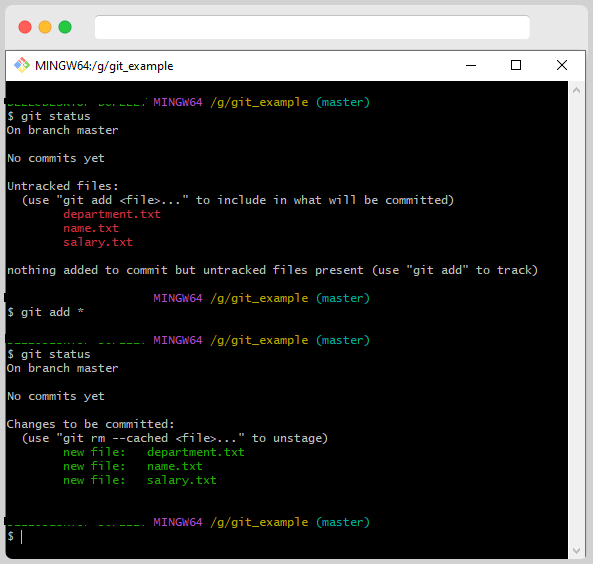
Output: All the changed files are now moved to staging.
If you have changed a file you no longer want to track, you can use the ‘git rm’ command to remove it from your Staging Area. This will tell Git that the updates that were pushed to staging earlier with the git add command are not wanted.
If you run this command, git will remove the changes from the staging area. However, the changes will still exist in your local repository. So, if you want to remove a file from the staging area to the working directory, then you can do so by using the below command
git rm –cached <filename>.
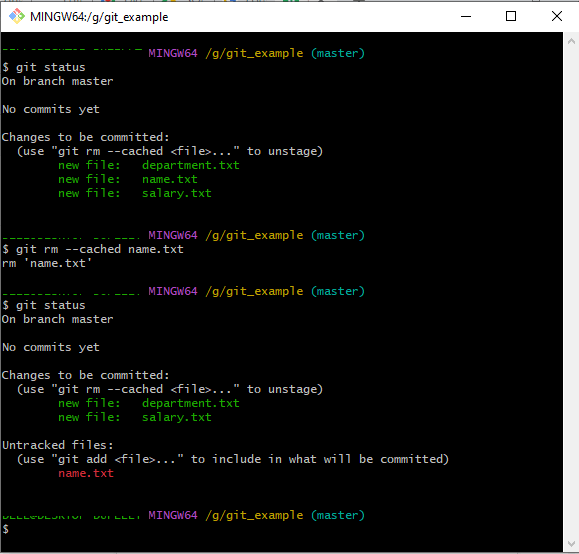
Remove Multiple files
To remove multiple files from the staging area, you can use the command
git rm –cached <filename><filename>
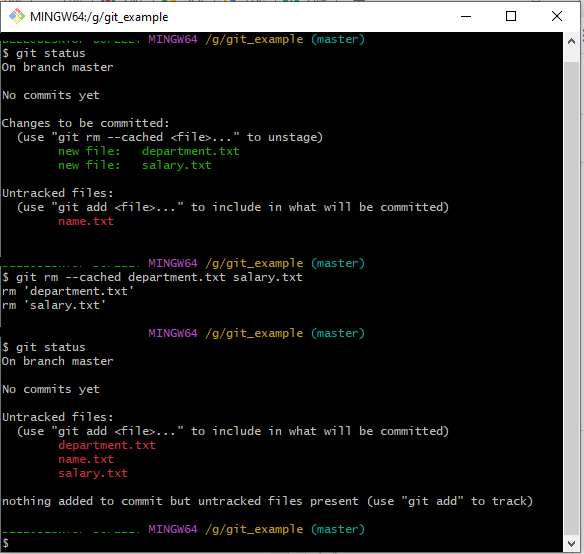
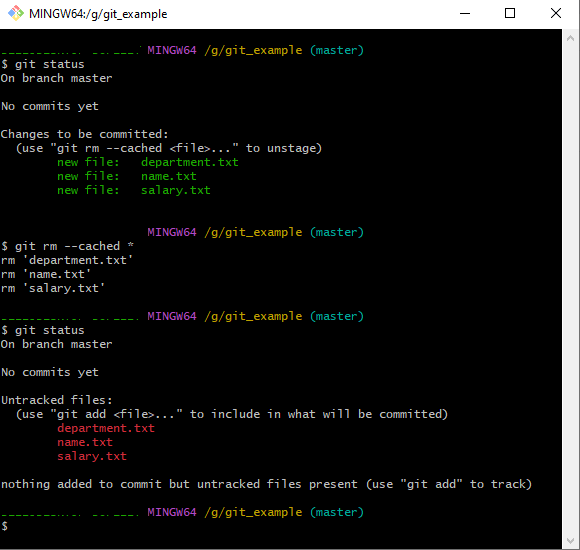
Remove All Files
You can use the wild character * to remove all the files of the staging area from the working directory.
git rm –cached *
