If you’re working with code, then Git is a tool you need in your Syllabus. It helps manage source code development and history so everyone can work together efficiently. Plus, it’s distributed, which means it can be used by product managers, developers, and data scientists simultaneously! In this article, we’ll explore one of Git’s most powerful features- tagging and how the git tag command works.
What is Git Tag?
The Git version control system is a fantastic tool! It has many great features that help streamline the process of tracking files in coding projects. In this article, we will discuss the git tag command. This awesome command allows you to label your commits and other Git objects by assigning them readable names that can be easily referenced when we are traversing the history of a Git repository.
When we are creating a tag, you can specify the commit that should be pointed to by the new ref.
You might use tags to mark specific releases of your software project or other events in the history of your repository. The Git tags are in human-readable label format instead of the lengthy SHA-1 GUIDs.
| Post Type: | GIT Tutorial |
| Published On: | www.softwaretestingo.com |
| Applicable For: | Freshers & Experience |
| Get Updates: | Join Our Telegram Group |
How To Create Tags in Git?
If you’re not familiar with the Git Log, it’s advised that you read the tutorial about it first. You can create tags in Git very simply by associating them with either the commit to which your HEAD points or a specific commit of your choice.
Types of Git Tags
There are mainly two types of tags available in Git: they are annotated and lightweight. By using both Git tag types, you can commit in the repository, but there is a slight difference in the amount of metadata that is stored.
Annotated Tags
Annotated tags are a great option if you’re looking to store extra metadata for your project. Annotated tags store the author name, release notes, tag message, and date as full objects in the Git database. This data is important for the public release of your project.
Suppose you’re looking to add some extra context or detail to your tags, like a tag message or annotation, something similar to a commit message. This all can be done by using the -a annotation.
git tag -a v1.0.0

You will create a new annotated tag identified with version v1.0.0 by executing the above command. The command will then open up your commit editor so that you can fill up the metadata – super easy and user-friendly!
If you want to add the tag message to the tag, then you can do that by using the -m option, which is similar to git commit -m.
$ git tag -a v1.0.0 -m "Releasing version v1.0.0"

Lightweight Tags
The simplest way to add a tag to your git repository is by using a lightweight tag, which only stores the hash of the commit it refers to. To create one of these lightweight tags, just omit the -a, -s, or -m options when you run the ‘git tag’ command.
Example:
$ git tag v1.0.0

How To Add a Tag In Git?
For Crete tag to a commit, follow the below steps:
- Open the Git Bash on your working directory.
- Before executing the Git Tag command, check whether the directory is clear or not by running the Git log command. To check to execute the below command.
git log --oneline

We can tag any of the commits by executing the following command:
git tag <tag name> <branch name>
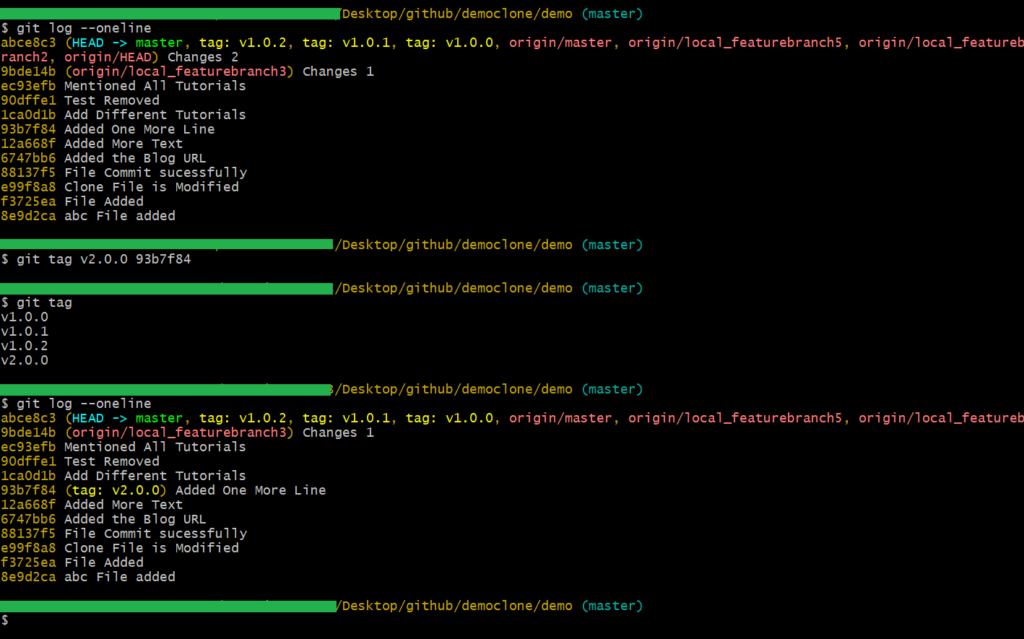
Note: If you change a branch, it will not appear in any other branches. Because the branch is separate from all other branches.
To see the tags, you can execute the git log –oneline command.
How To Tag Specific Commit In Git?
If you want to tag a specific commit on a branch, then we have to use the hashcode of that commit. So, to list down all the commits of the branch, you can use the git log –oneline command.
To tag into a specific commit, you can use the below command:
git tag -a <tag_name> -m "<Message_for_commit>" <commit_hash_code>
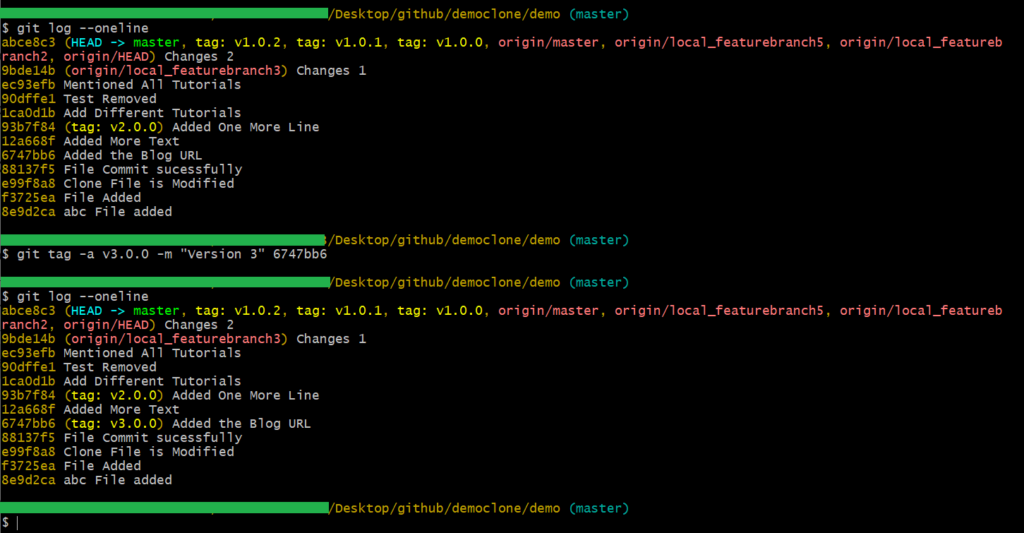
Note: “-a” denotes the annotated tags, which in layman’s terms means tags that are specific and not generalized. -m is the flag to tell that the sentence followed is the commit message.
After executing the command, if you want to see the details, you have to execute the git log –online command.
How To View Tags of a Branch In Git?
If you want to see all the tags of a branch or repository, then you have to execute the below command:
git tag
Until this, whatever tags we created are all reflected in our local branch, but those are not available in the remote repository on GitHub. So, to make these tags in the remote repository, we have to push those tags.

How do you Push Tags to a Remote Repository or GitHub?
Pushing tags into the remote repository is similar to pushing branches to a git remote. The only difference is you have to mention the tag name after the “git push” command as, by default, this command only pushes the branch.
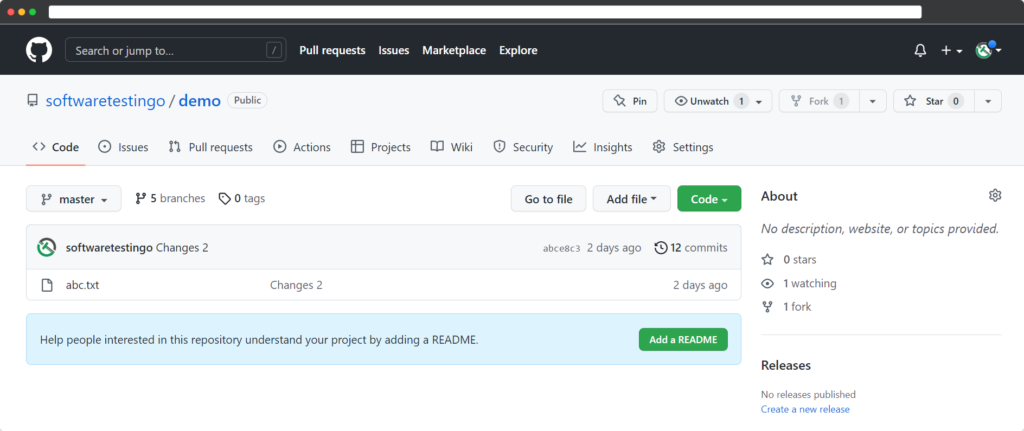
$ git push <remote> <tagname>
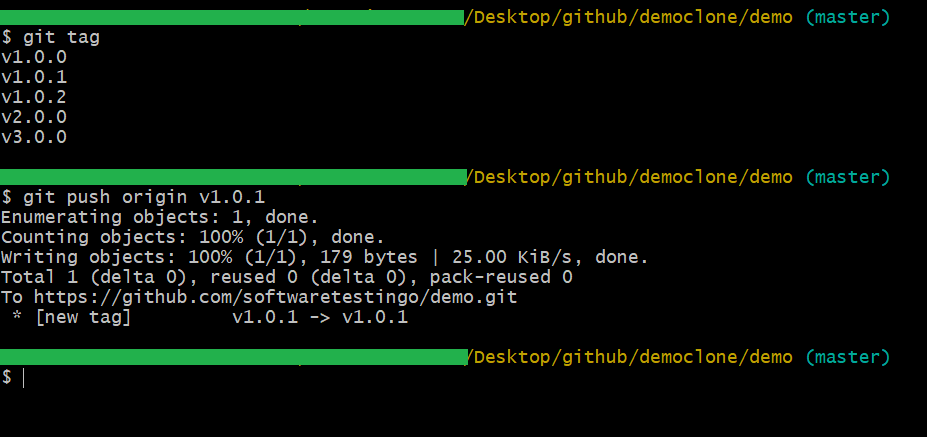
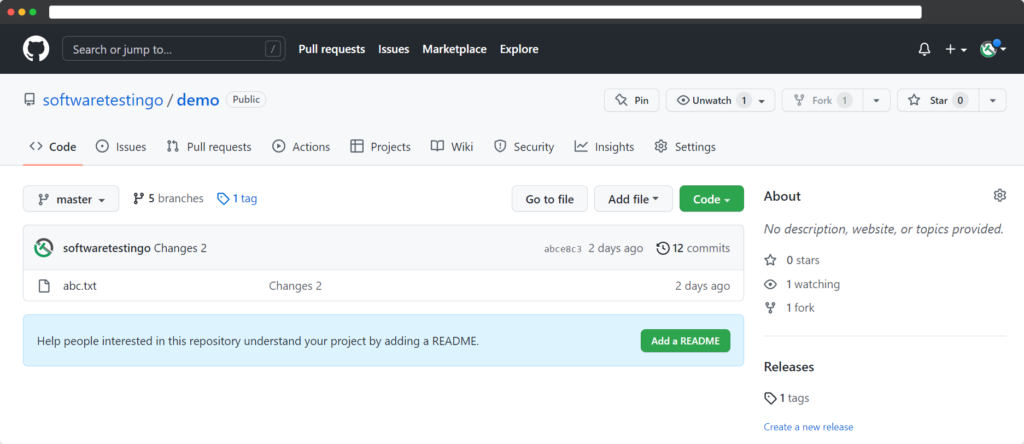
Push all git tags to the remote.
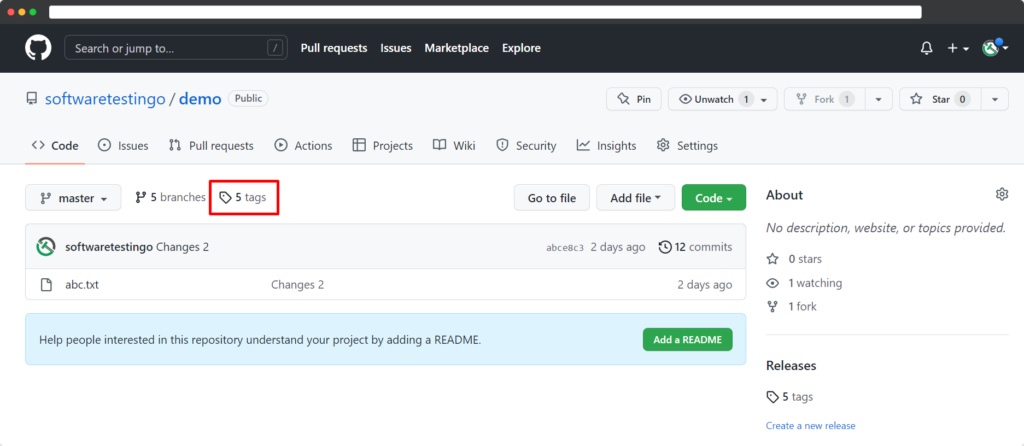
If you want to push all the tags of the local branch to the remote, you have to add “–tags” with the git push command, which will simultaneously push all the tags to the remote. However this process is not recommended because if you push all tags at a time, it will be very difficult to get rid of bad tags from the remote.
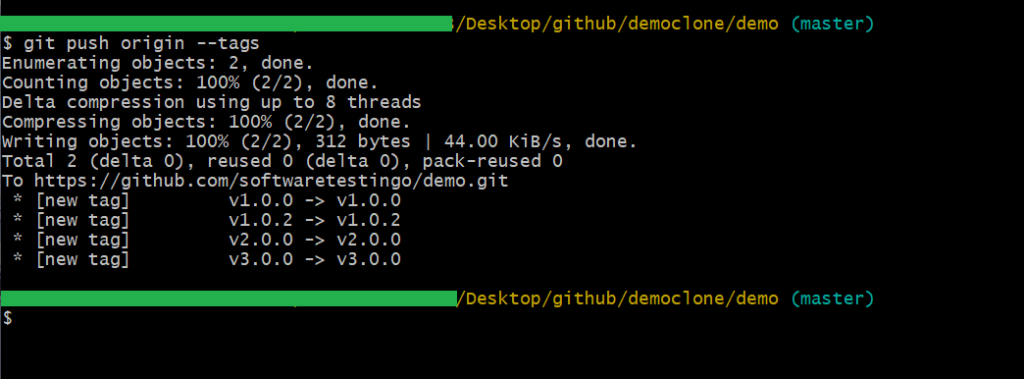
git push origin --tags
Additional Commands
There are a few other additional commands that you can use with the Git tag command, but out of that list, we tried to list down some frequently used commands. We have listed below:
Git Tag List
You can use these Listing tags when there are many tags on your branch or repo, and you want to see those as a list. Also, with this tag, you can filter your tags by using wildcard characters like *.
git tag -l "v1.1.*"

If you notice, when you execute the git tag command, you are not able to see the contents of your annotations. If you want to see the contents, then you have to use the -n on your command like below:
git tag -n3

Tag details
Using the Tag details command, you can see the Tag details and information from the tagged commit.
git show <tag_identifier>
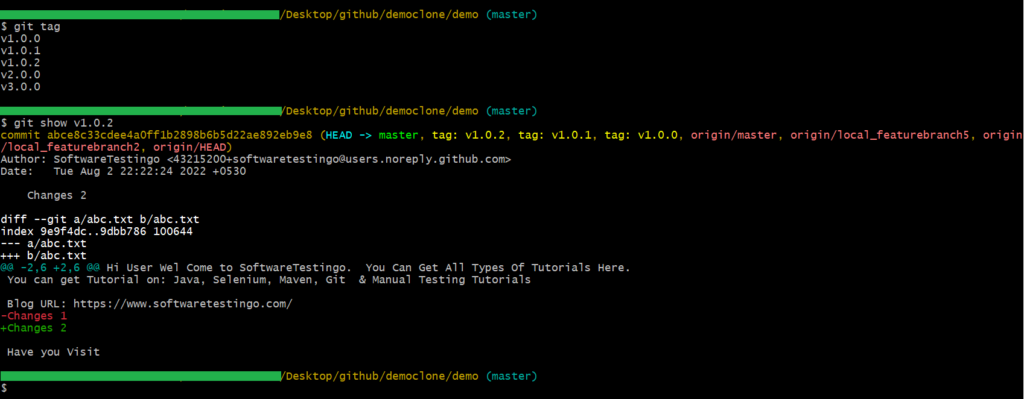
This command gives you information like the author’s name, creation date, message, GnuPG signature if present, and the information about the referenced commit. If the tag is lightweight, the output will be limited to the information about the referenced commit.
Editing tags
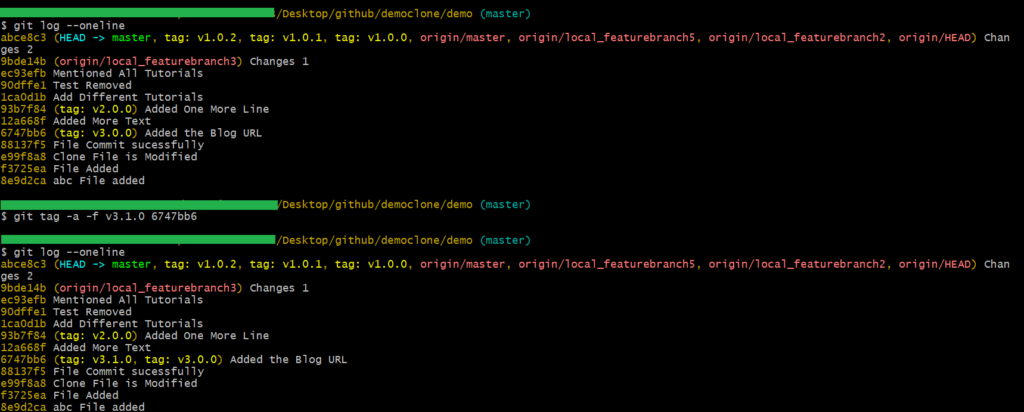
If you have tried to create a tag with the same name already present in that branch, you will receive an error. To deal with such conditions, you can use the -f or -force in your git command instead of deleting and re-adding the tag.
git tag -a -f <tag_identifier> <commit_id>
Git Tag Delete
In our daily job using delete, the tags are rarely used because tags do not use any resources unless you mistakenly created a tag to the wrong commit. In that case, to delete the tag, you can use the below command:
git tag -d <tag_identifier>
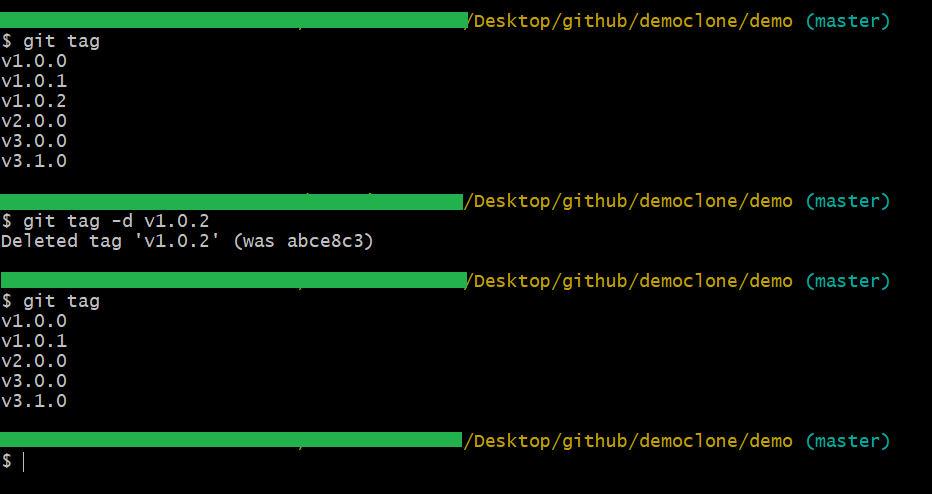
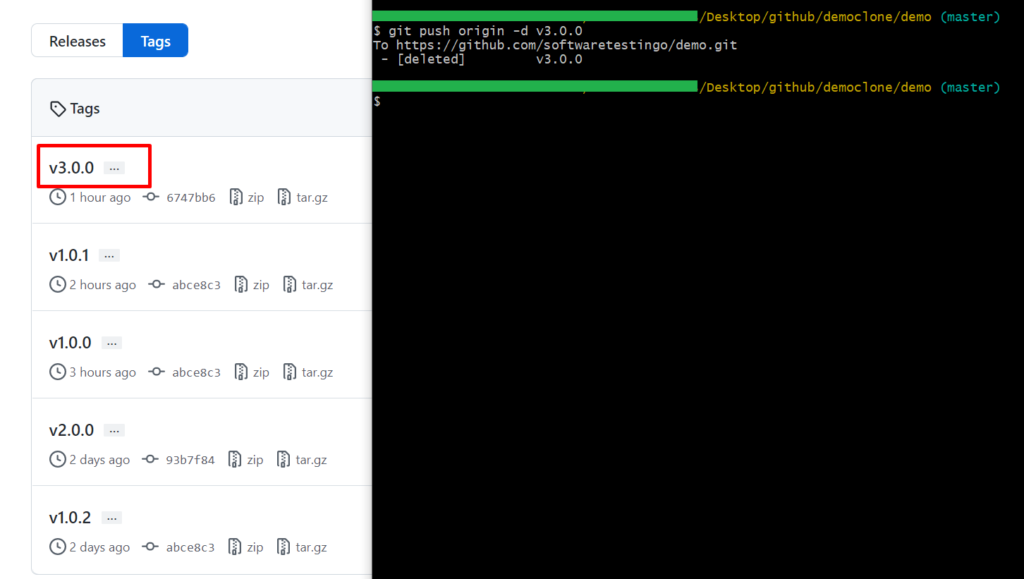
If you want to delete a tag from a remote repository, then you have to use it like below.
git push origin -d <tag_identifier>
