Connecting Eclipse to GitHub is a fundamental skill for software developers or automation testers who use Eclipse as their primary integrated development environment. By integrating Eclipse with GitHub, developers can easily manage their source code, collaborate with team members, and perform version control tasks without leaving the Eclipse environment.
This guide will walk you through the steps required to connect Eclipse to GitHub. Whether you’re new to using GitHub or just looking for a refresher, following the instructions in this guide will help you get started with integrating these two tools and streamline your development process.
| Post Type: | GIT Tutorial |
| Published On: | www.softwaretestingo.com |
| Applicable For: | Freshers & Experience |
| Get Updates: | Join Our Telegram Group |
Connect Eclipse With GitHub
In this blog post, we are going to learn about:
- How to Set up and install Eclipse with EGit and get a GitHub account
- Clone/fork an existing project from GitHub and import it into Eclipse.
- How to Push Changes to Remote Repository?
- Commit File Changes to the GitHub project from Eclipse.
- How to Push New Eclipse Project to GitHub
Installation and Setup In Eclipse
If you want to start developing software, you need to have Eclipse and EGit installed on your computer. You will also need a GitHub account to access the code repositories.
Download Eclipse: First, You have to download Eclipse from the official website of Eclipse If you have not downloaded it yet.
Install EGit Extension: If you’re using Eclipse, EGit is a plugin that allows you to interface with Git. Version control is becoming increasingly important; EGit comes pre-installed with Eclipse downloads. If it is available within Eclipse, then there is no need to follow the below steps.
If the EGit extension is not installed on your Eclipse, then you can install it by following the below steps:
Open Eclipse and Click on Help Menu, then Click on Install New Software; it Will open the available software dialog box like below.
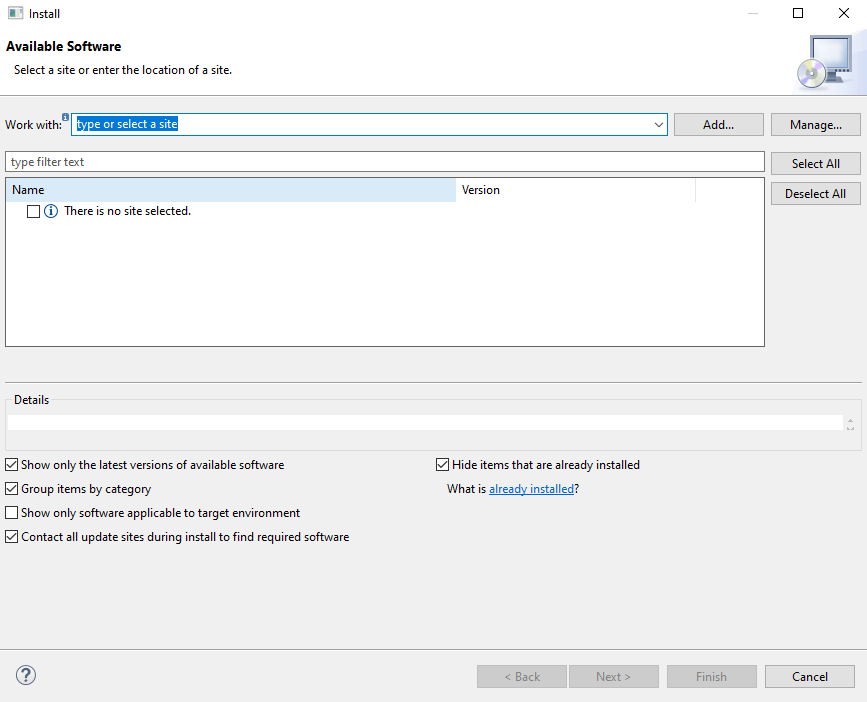
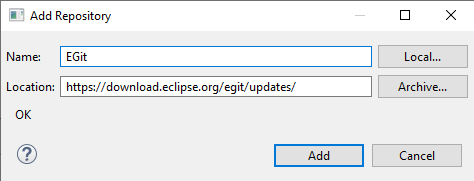
Then Click on the Add button. After that, in the Name text box, enter EGit, and in the URL text box, enter https://download.eclipse.org/egit/updates/. Then, Click Add in the dialog box.
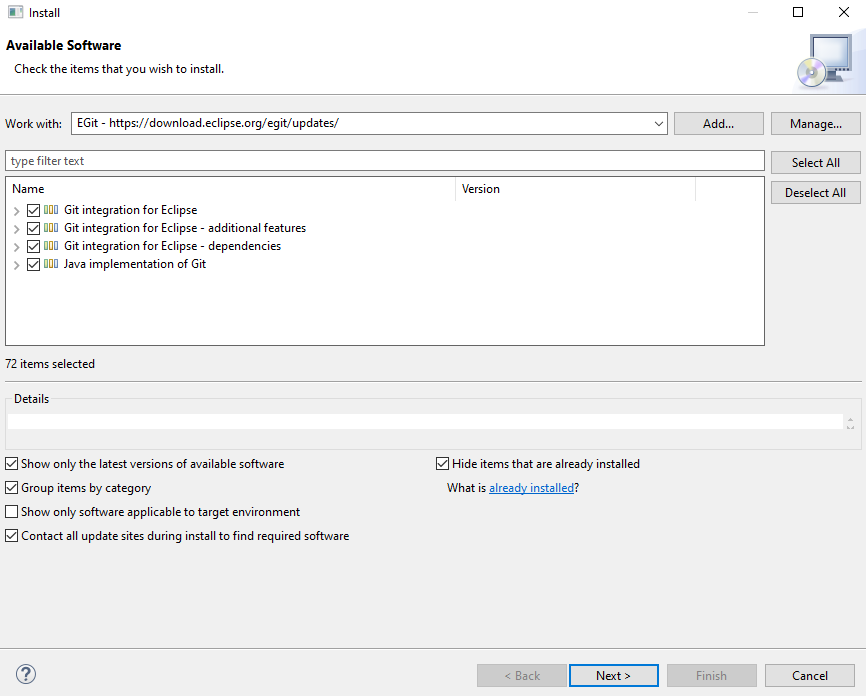
Then, It Will Display all the related extensions. There, you need to select all the checkboxes and click next.
After that, accept the terms and conditions and Click finish. Once you click, the EGit install becomes successfully completed.
Create a GitHub Account: We have already created a GitHub account during the GitHub blog post. If you don’t have a GitHub account, then to create your GitHub account, you can follow our detailed blog post, where we have described in detail the GitHub account creation process.
Create a repo in your GitHub account: After Creating an account on GitHub, you need to create a repository on GitHub. If you are worried about how to create a Git repository, then you can follow our detailed blog post on how to create GitHub Repository.
Clone/Fork an existing project from GitHub and import it into Eclipse
Import your repository into Eclipse: The final part is importing the repository to our GitHub account. So, to Import your repository from GitHub, you can follow the below steps:
- Open Eclipse with EGit installed.
- In Eclipse, choose File, then Import.
- In the dialogue that opens, choose Git > Projects from Git and click Next
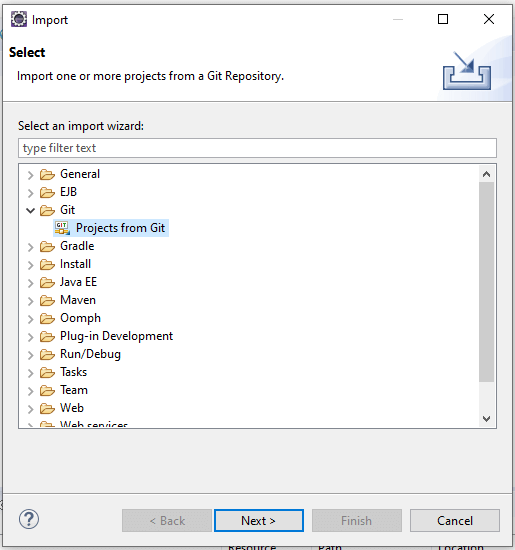
If You have an existing local repository on your local machine, then you can go with the existing local repository option. But for now, we are going to use the repository present on GitHub. So, for that, you have to choose the Clone URI option.
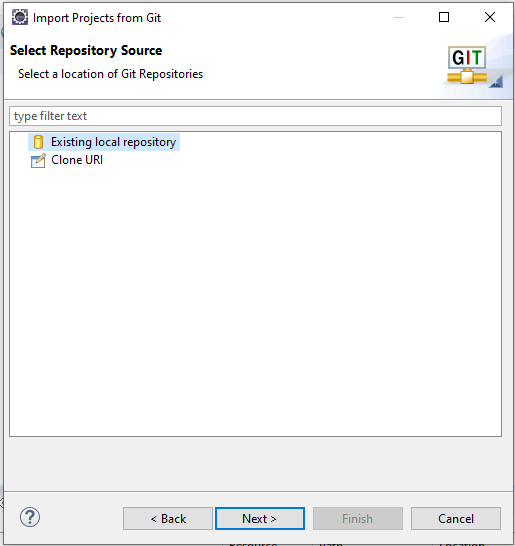
Click on Clone URI and click Next.
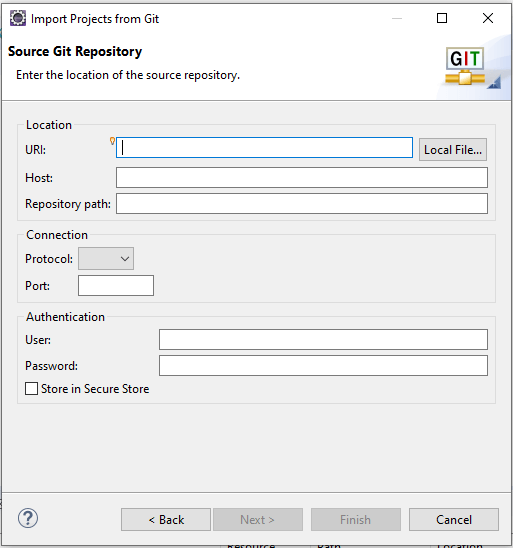
You have to fill in the required information such as URI, Host, Repository Path, Username, and password.
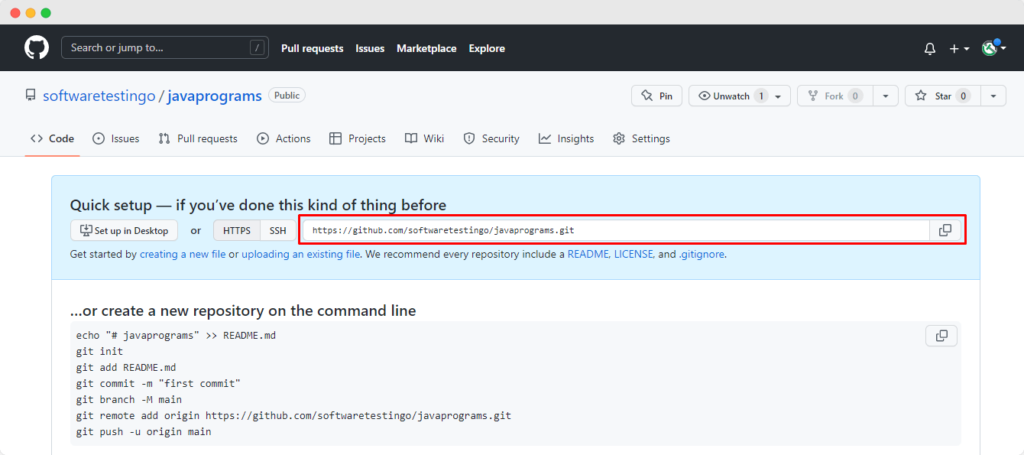
You can get the URI from your GitHub Repository URL.
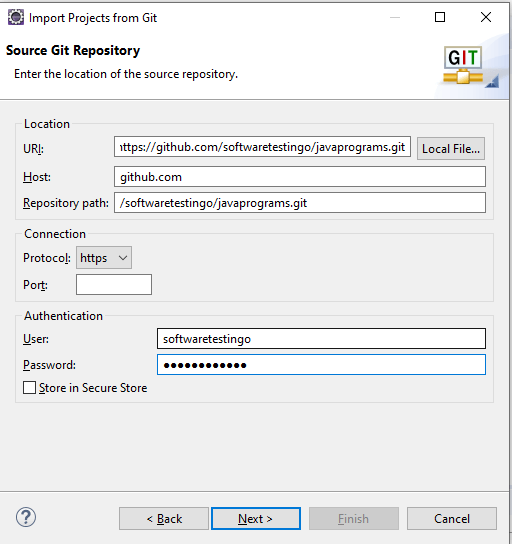
You need to enter “github.com” in the Host text box because our repository is hosted on GitHub.com. In the repository path, you need to enter the path of the repository.
The Full URL of our repository looks something like this: “https://github.com/softwaretestingo/javaprograms” but we need to mention the username and the repository Name. In This case, which is “/softwaretestingo/javaprograms“
Note: When you enter the URI, it will automatically collect the information of HOST and repository URL:
After that, you have to enter your GitHub username and password for authentication and Select the Store in the secure store checkbox. Then Click Next.
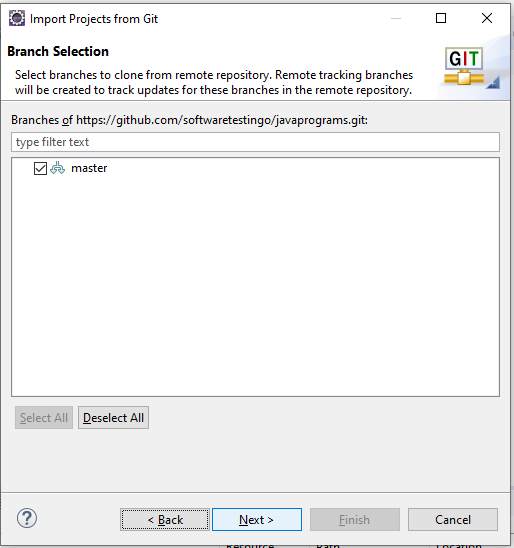
After Clicking Next, it will connect with the GitHub Remote repository, and in Return, it will display all the branches of the mentioned repository. We have only one branch available, so the master branch is displaying.
Select the Branch and Click Next.
Here, if you want to change the local repository location, then you can configure it here otherwise, if you want to proceed with the default location, then you can click next.
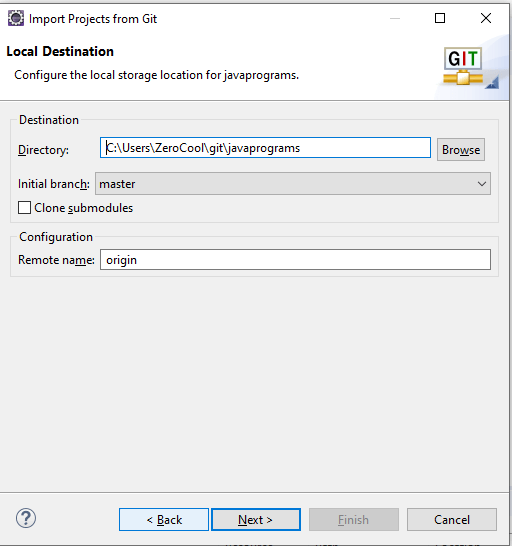
You can notice our remote is downloaded to our local machine. And you can click next.
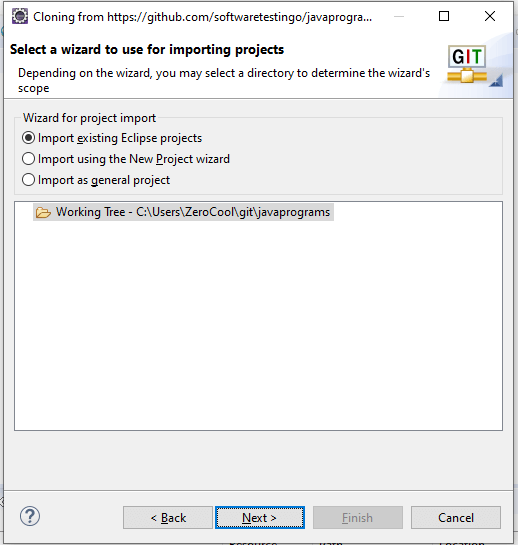
Currently, in our repository, we don’t have any projects. That’s why we are getting this screen. If you have any projects, then those projects will be listed here. We don’t have any projects here, so that I will create a project here. Select Import Using the New Project wizard and click the finish button.
Note: You will not get the options below if any project is on your repository.

Another new pop-up will appear on the Click Finish button, and we select Java Project. If you want to create any other type of project, you can select any other one.
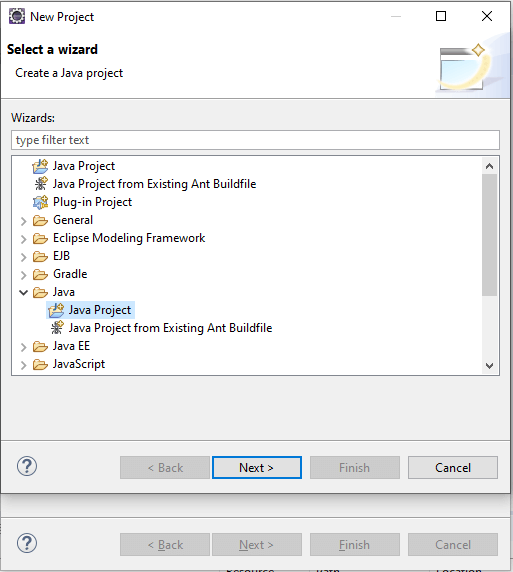
Select Java Project and click Next. On Click Next, it will ask for your Project Information.
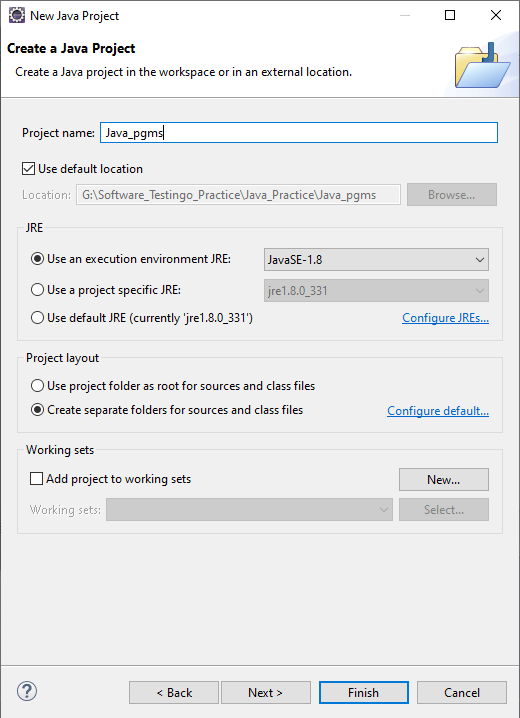
Click the Finish Button. And the Java Project is added to Eclipse.
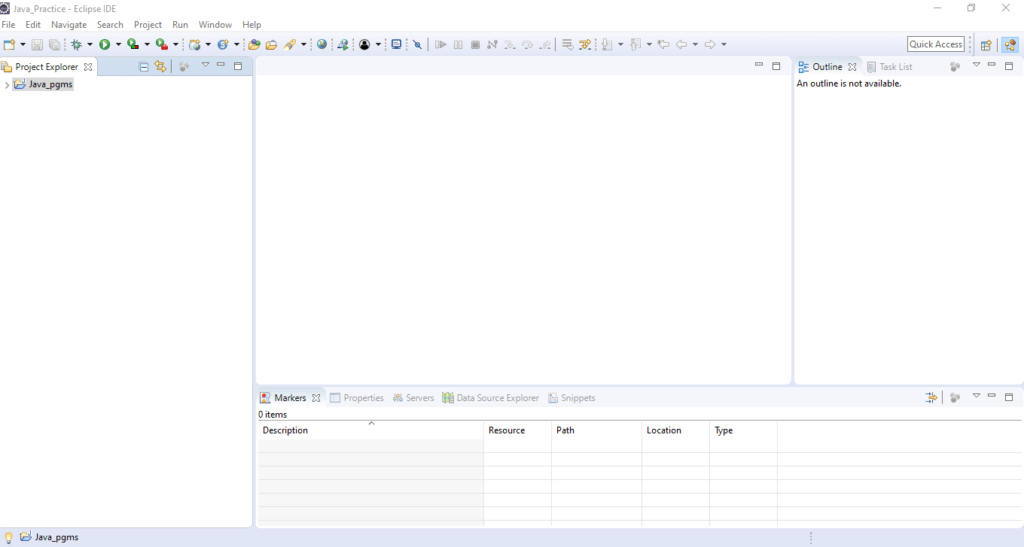
How to Push Changes of Existing Repository to Remote Repository?
To Connect with Remote or Share your Project, you have to right-click over your project and Choose Team – > Share Project.
Now, we need to select the repository from the repository dropdown, or you can click on the create button to create a repository on the local machine.
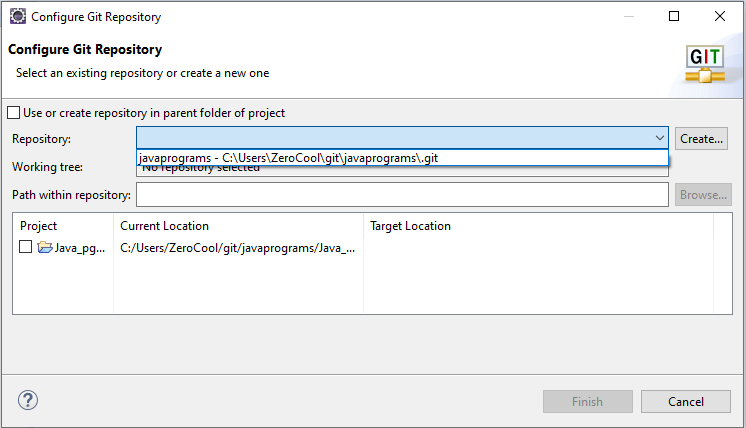
Select the Project Checkbox and Click the finish button.
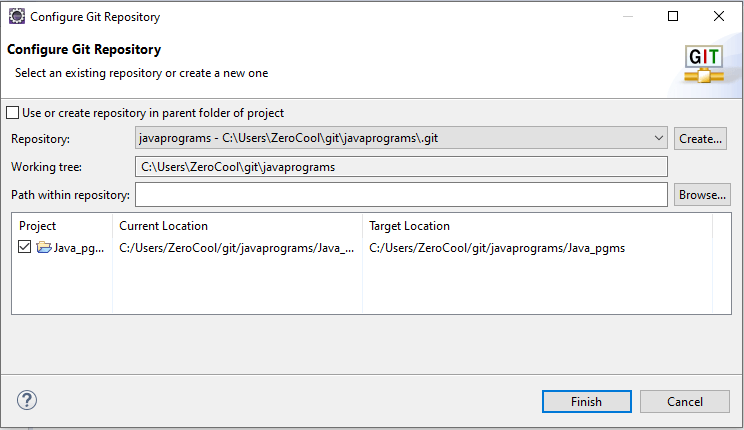
After clicking the Finish button, you notice that the Local project directory is linked to the remote repository.
We have added some files, and now, before pushing those changes to the remote repository, we need to commit those. So, to commit, You have to follow the below steps.
How to Push New Eclipse Project to GitHub
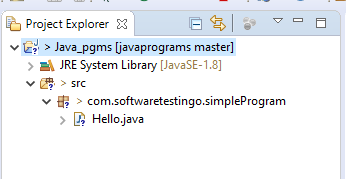
We should have a project in our Eclipse to push a repository to Github. So, let us create a project. To Explain, I have created a simple Java project and have a class in that. Here is the structure

Now, we are going to push this new Java project into our GitHub Account. For that, right-click on the project – Team – Share Project.
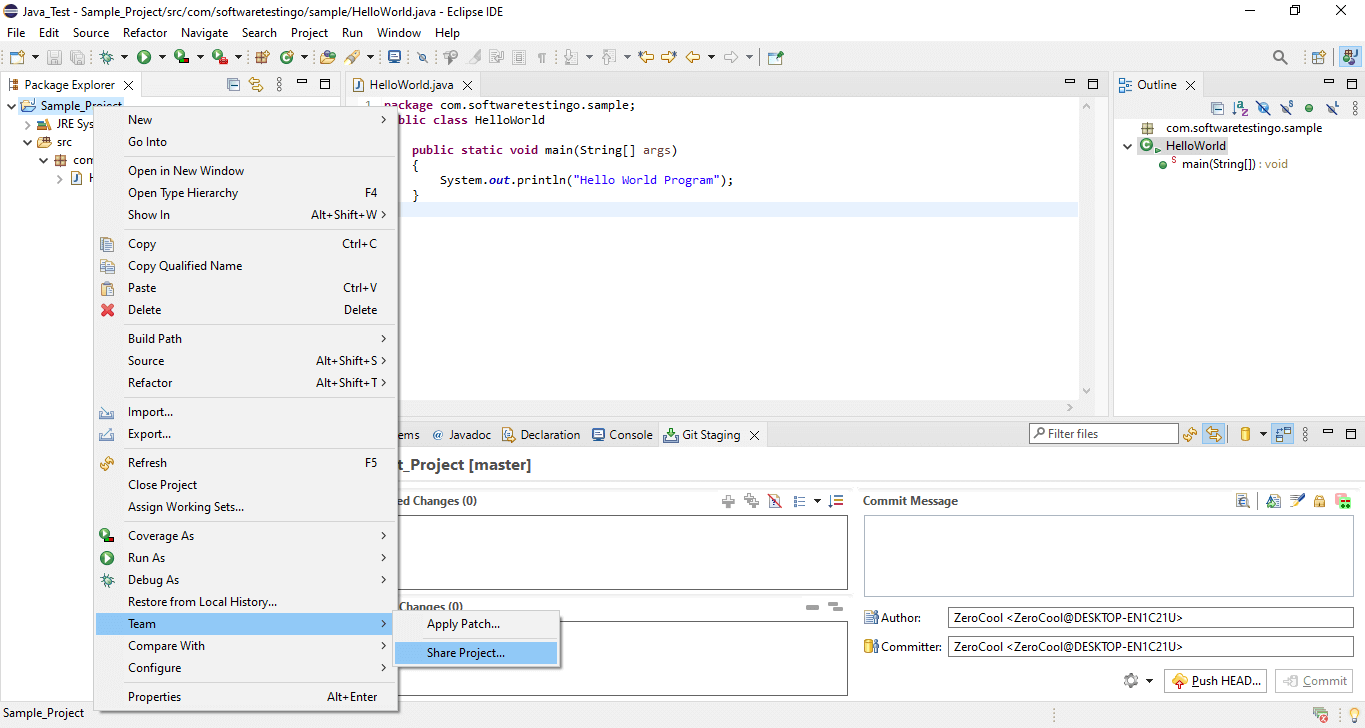
When you click on share project, you will get the Configure Git Repository popup.

You can see the repository text box is blank, which means no repository is selected. We need to create a repository or need to select an existing repository.
In this scenario, we need to click on the create button because we don’t have any existing repository. Then, we will get another popup named Create a New Git Repository.
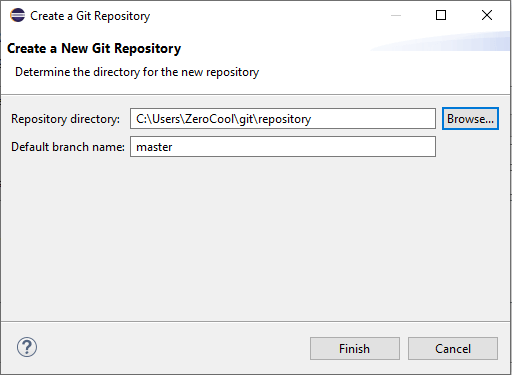
This popup is asking for the local repository directory and what is the default branch name.
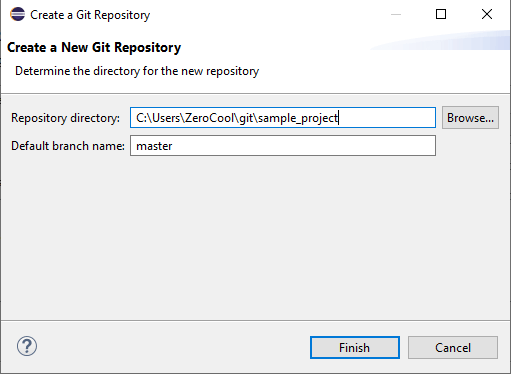
As you can see, I have set the local repository directory as “C:\Users\ZeroCool\git\sample_project,” and the default branch name is master, but you can give any name there and click finish.
After Clicking on you can notice in configure git repository popup the repository name and Target Location are updated, and click the finish button.
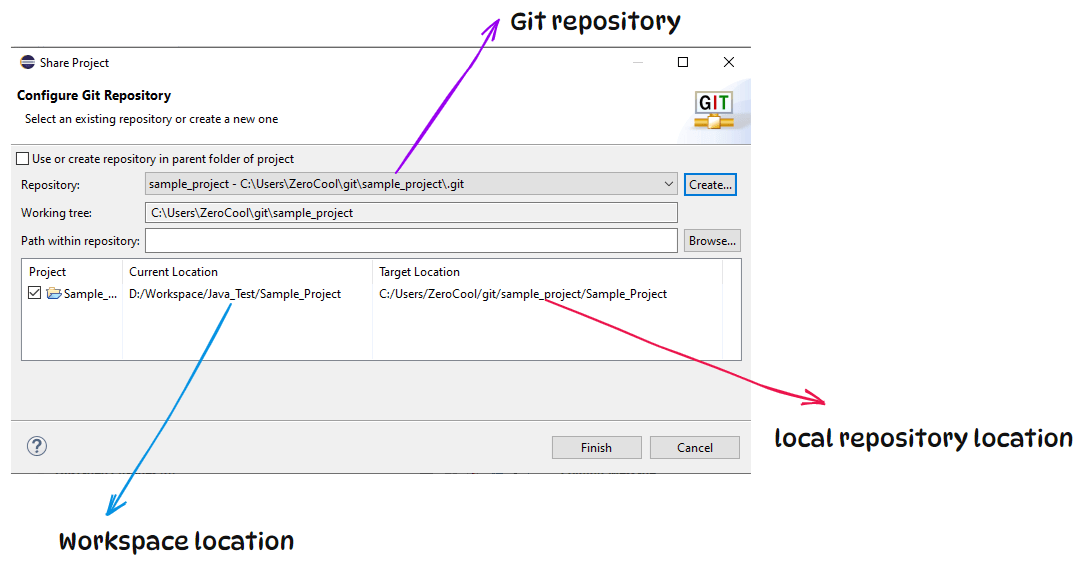
Now, our local repository has been created, and if you notice, the marks on your project file, packages, and project questions are displaying.
Up to this point, we are done with the setup of the local repository, but still, a few things are pending, like the remote repository (GitHub Repository) and the link between the Local and remote repository.
If you don’t know how to create a GitHub account and a repository, then you can follow the link and complete the action.
Once you are done with this, we can proceed with linking Local and remote repositories by following the below steps:
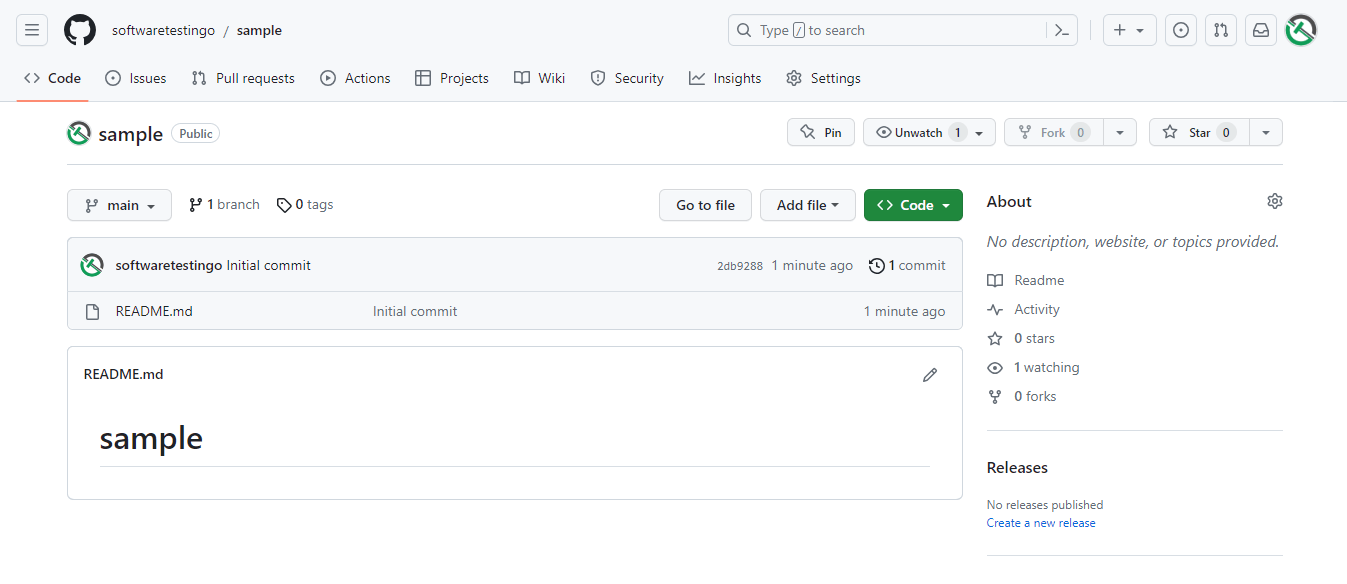
To Connect to the Remote Repository
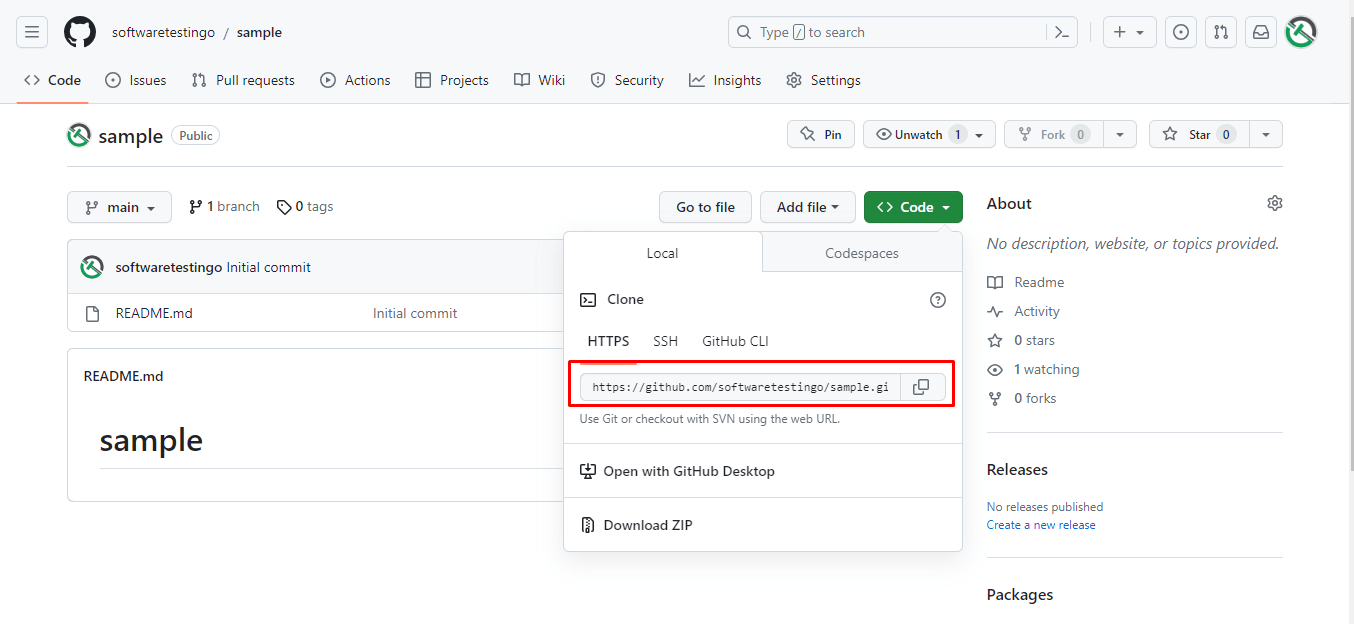
Click on the code button and copy the HTTPS URL of the remote repository.
To Connect Eclipse with the Remote repository, Right Click on the project – Team – Pull.
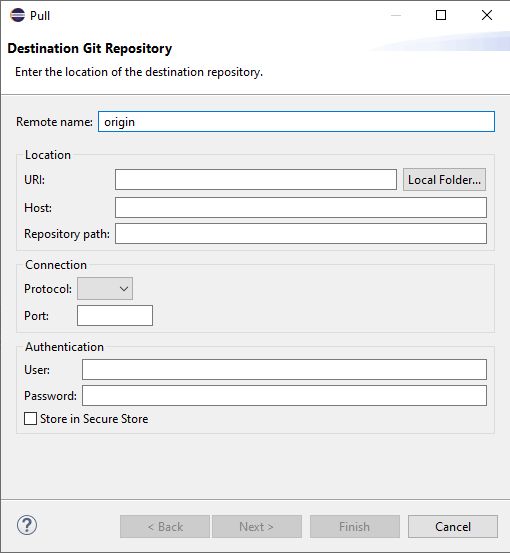
In the URI text box, paste the copied URL as you paste the URL, and when you paste the URL, automatically, the HOST, Repository Path, and protocol will be populated.
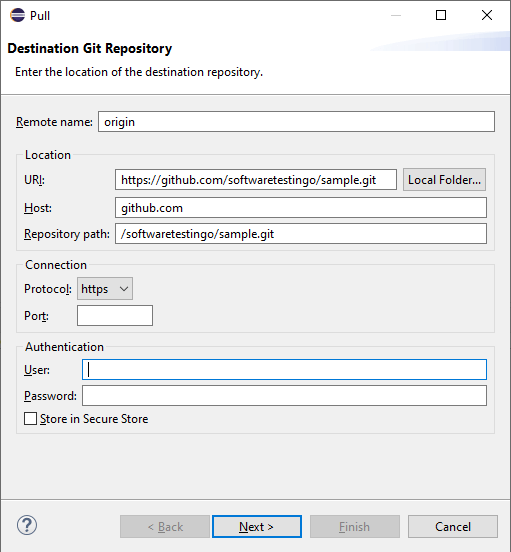
Then, enter the username and password, then click next.
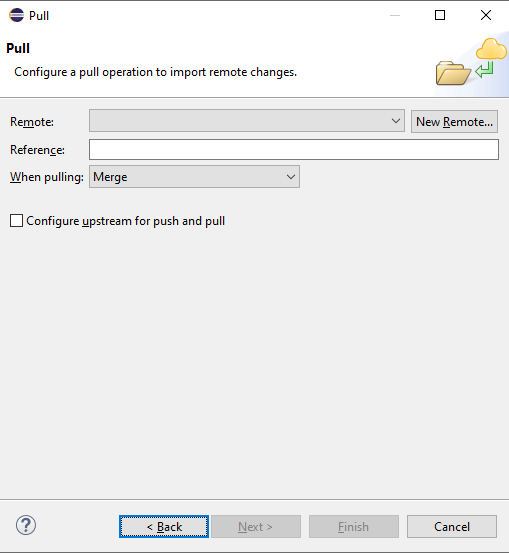
Click on the New Remote button, enter the same details in the same destination Git repository popup, and click finish. Now, in the pull popup:
- Enter a reference name [refs/heads/main].
- Select Merge from the when pulling dropdown.
- Select the checkbox of configure upstream for push and pull
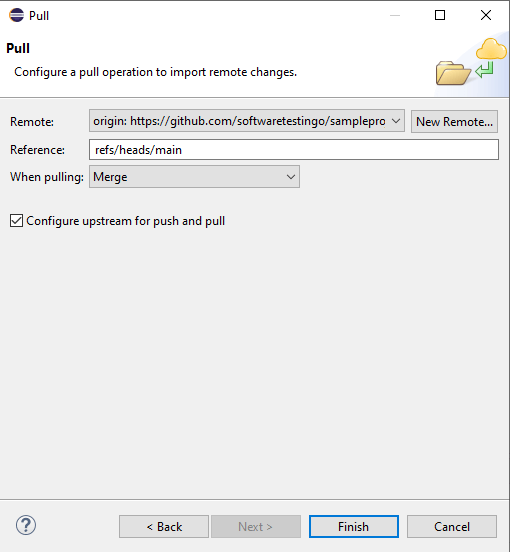
Now we have done with the link of the Local and remote repositories. The next thing is to commit the changes to the remote repository. To commit the changes, you can follow the below steps.
How to Commit Files Using Eclipse?
Right Click over the project — Team — Click on Commit
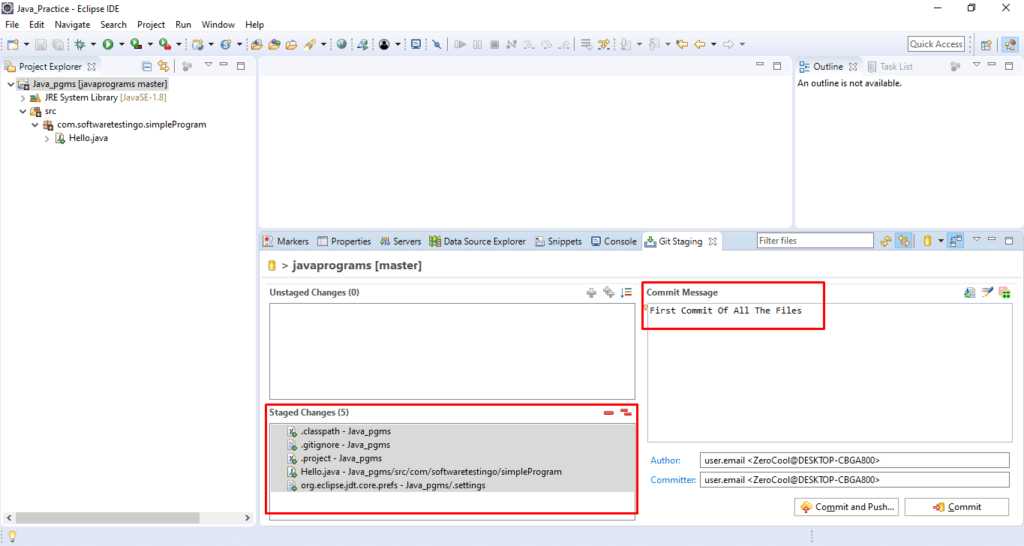
The Changes files will be displayed in the unstaged stanged area. You need to move those files from unstaged changes to the staged changes box, and after that, before performing the commit operation, you have to provide a meaningful commit message.
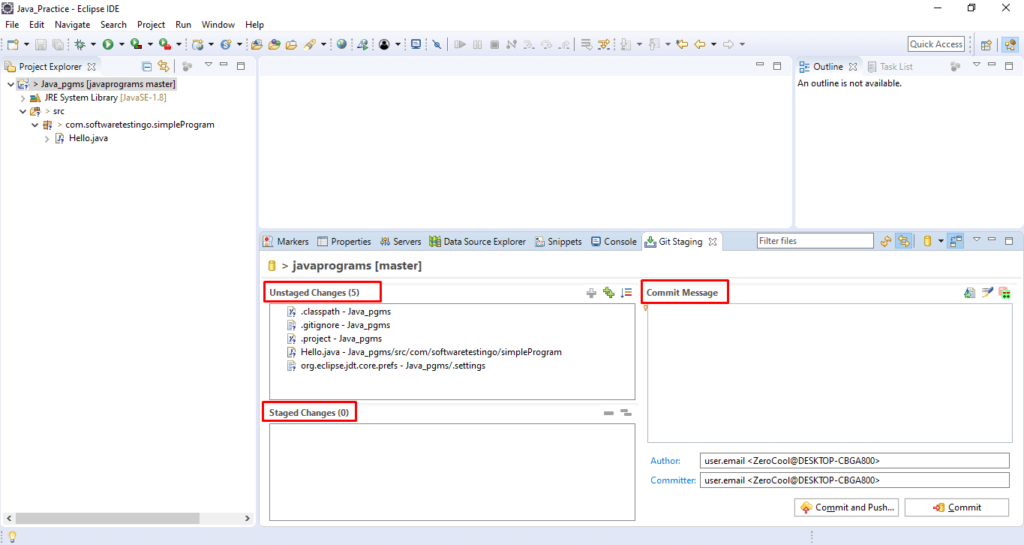
After that, to commit the changes, you can click on the commit button, or you can click on the commit & push button to push the changes to the remote repository.
Sometimes, when you click the Commit and Push button, you will get the login popup asking you for the username and password.
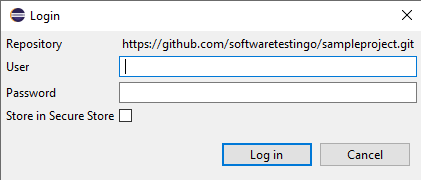
This is because GitHub has announced access tokens. To ignore this, you need to create access tokens. If you don’t know, you can follow how to create a personal access token post by clicking the link.
Once you have the access token, you can enter the username and password, check the store in Secure Store Check, and click on login.
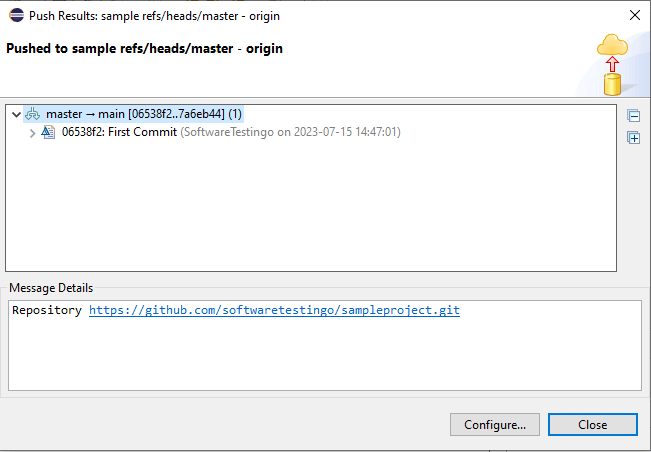
Once the commit process is completed, you will get a popup like the one below:
Conclusion:
If you’re working on a project yourself, the above workflow is all you need to start with Git version control. However, things become more complex when multiple people are editing the same files at the same time. In these cases, Git’s branching and merging features come in handy. While we won’t cover those topics in this tutorial, they’re well integrated into Eclipse and EGit.
In This tutorial, we tried to cover how you can connect with the GitHub repository from the Eclipse IDE. If you still face any issues, you can let us know in the comment section, and we will try to help.
How To Connect Eclipse To Github?
When you try to connect to GitHub, you can follow the above-detailed post, which we have explained in detail with the screenshots.


I’m having some trouble setting up Git to work on Eclipse. Does it have any trouble because of 2FA? Or does the repository require itself to be public or something?
Both are possisble because if you have 2FA then it is not able to access the repo.
If 2FA is enabled, it’s require token instead of password : https[:]//github.com/settings/tokens