While GitHub does offer password-based authentication, a more secure way to control access to resources is by using Personal Access Tokens. Although setting up Personal Access Tokens requires some effort, they offer several advantages over traditional authentication methods.
In this article, we will explore how Personal Access Tokens function in GitHub, why they are beneficial to use, and step-by-step instructions on generating a Personal Access Token for your GitHub account. For More GitHub Tutorials, you can follow this link.
What Is a GitHub Personal Access Token?
In GitHub, a Personal Access Token is a method of authentication that allows you to access GitHub services without using passwords. Each user can create their own token, which can be customized to specify the actions, or “scopes,” that it is allowed to perform.
While you can still use a password to authenticate with GitHub, using a token offers several advantages. Token-based authentication allows for more precise control over access rights, and it also allows you to grant temporary access for a specific duration.
How to Generate a Personal Access Token
To Create the personal access token, first, you need to log in to your GitHub account, and after that, Click on your profile picture.
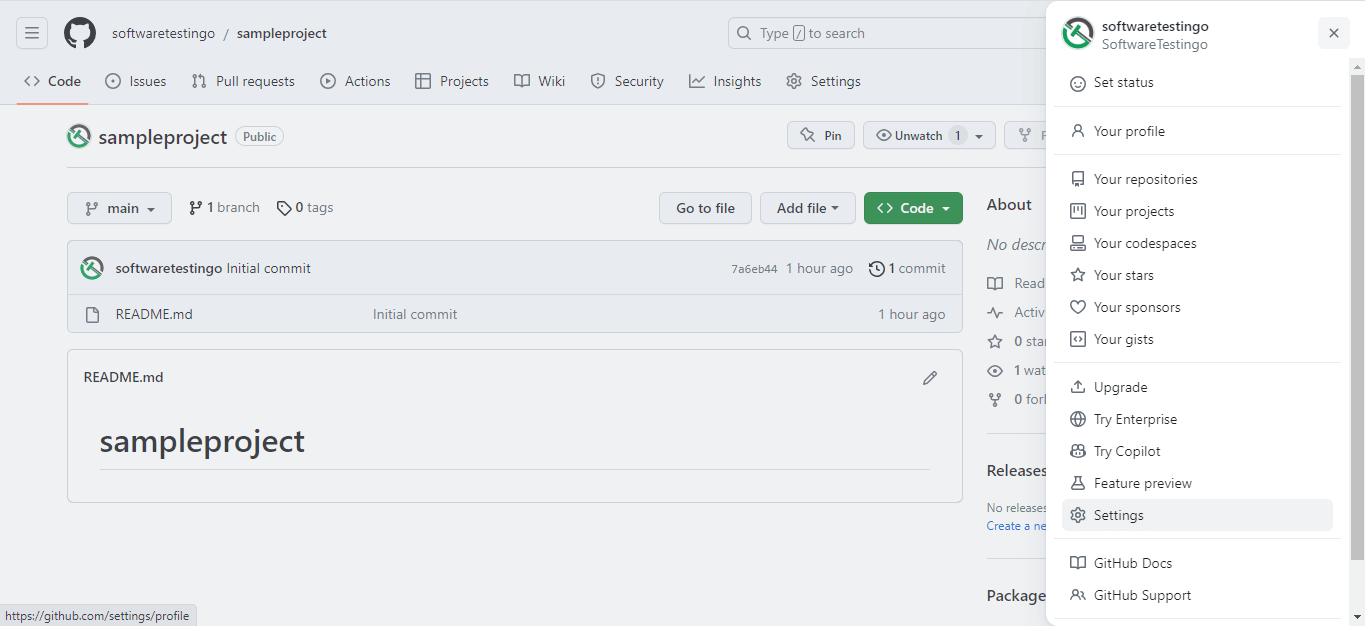
Then Click on the setting. So that it will redirect you to the public profile page
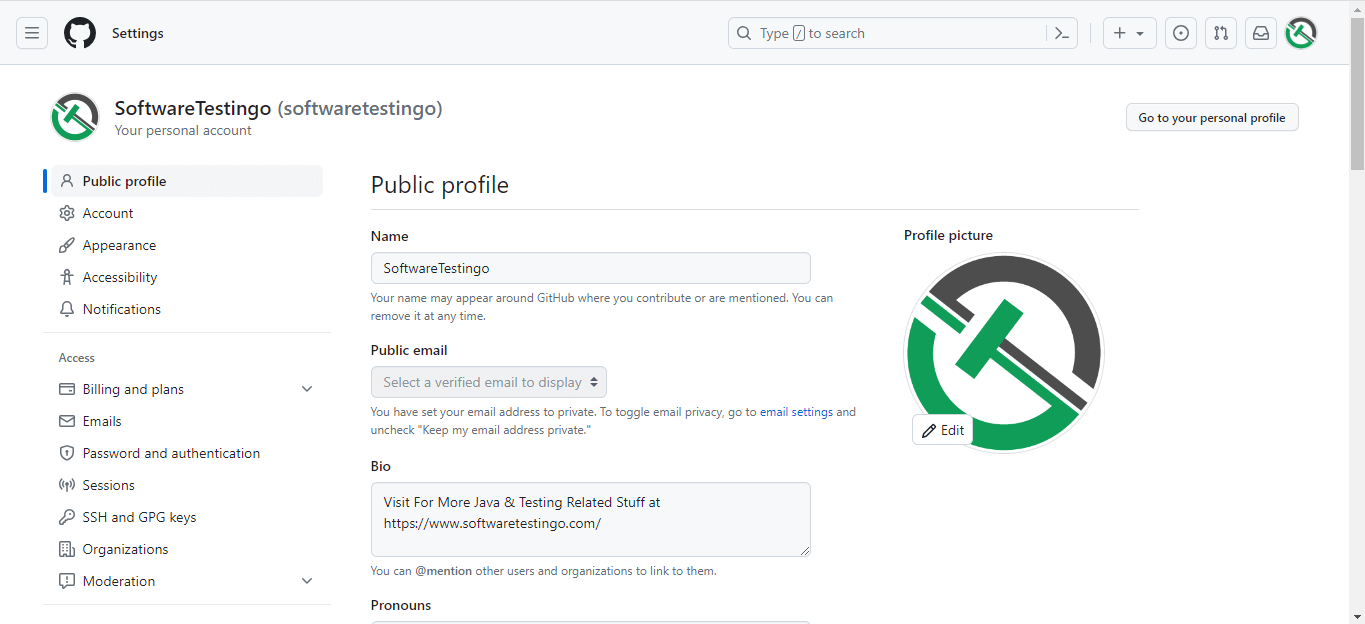
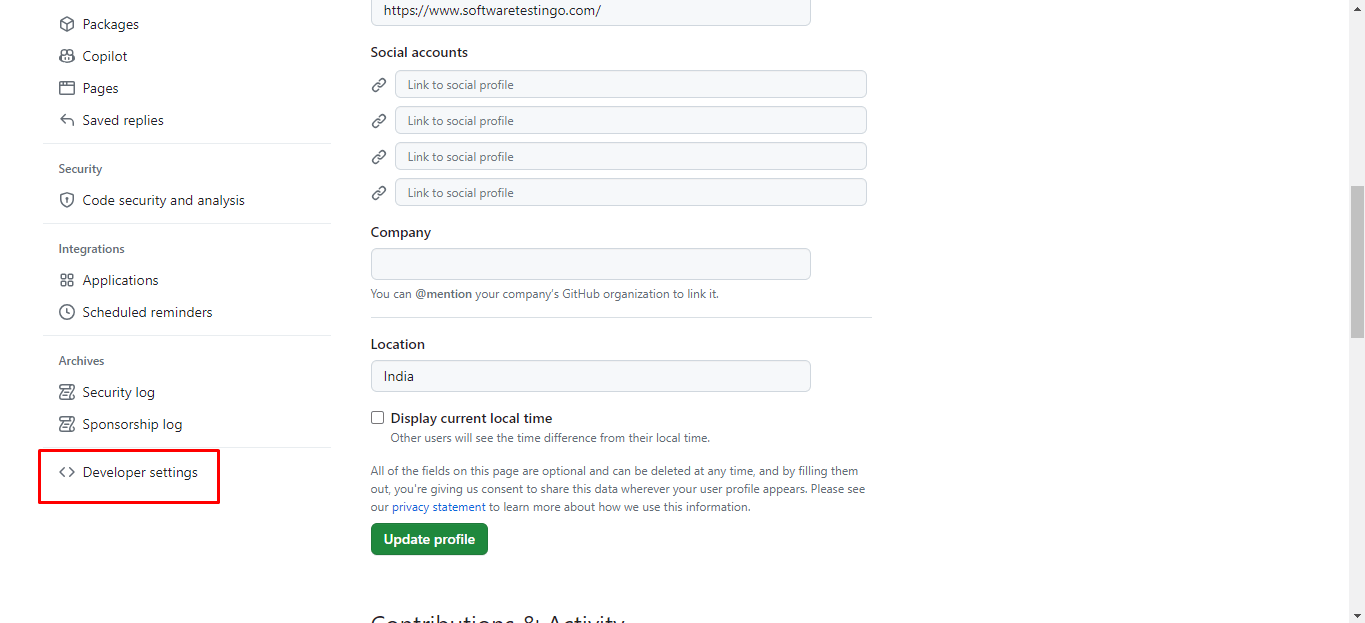
You will find the developer settings at the bottom of the Left Side menu; click on that to open Developer settings.
When the Developer settings page opens, it will look something like the below:

Click on the Personal access tokens, and then it will show you different ways to create access tokens. From different options, click on the Tokens (Classic).

To Create a new token, click on the Generate new token button.

You will also get various options here, but for the time being, we will go with Generate New Token (classic) and click on that.
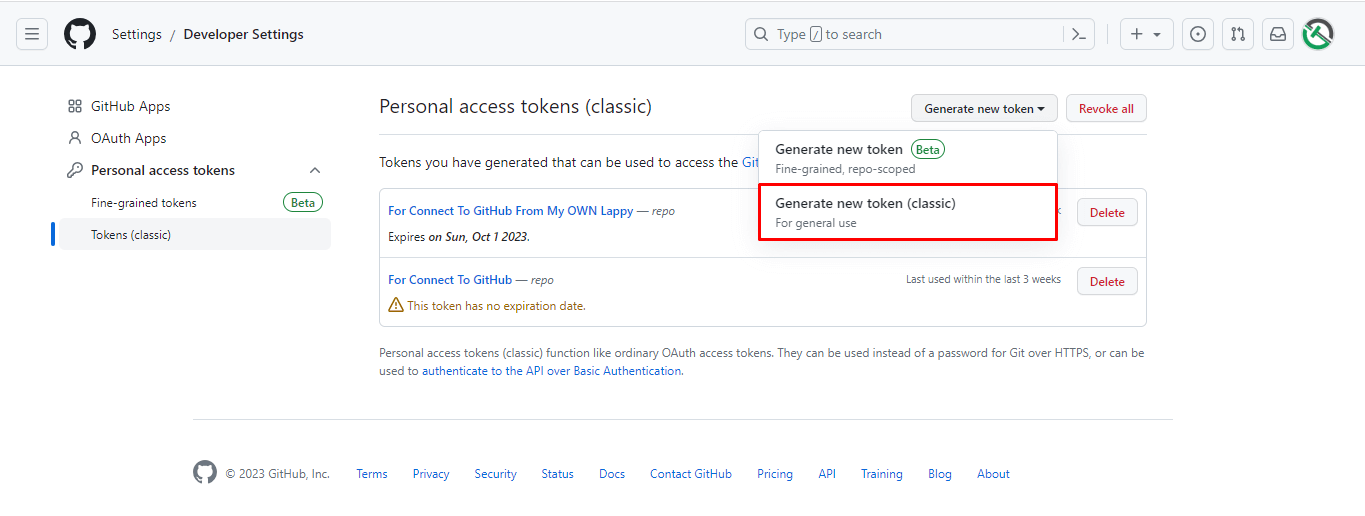
After this, you need to provide the information about this token, like the Name of the Token, Validity Expiration, and what type of access you want to provide for this token. After providing all the required information, you can click on the Generate token button.
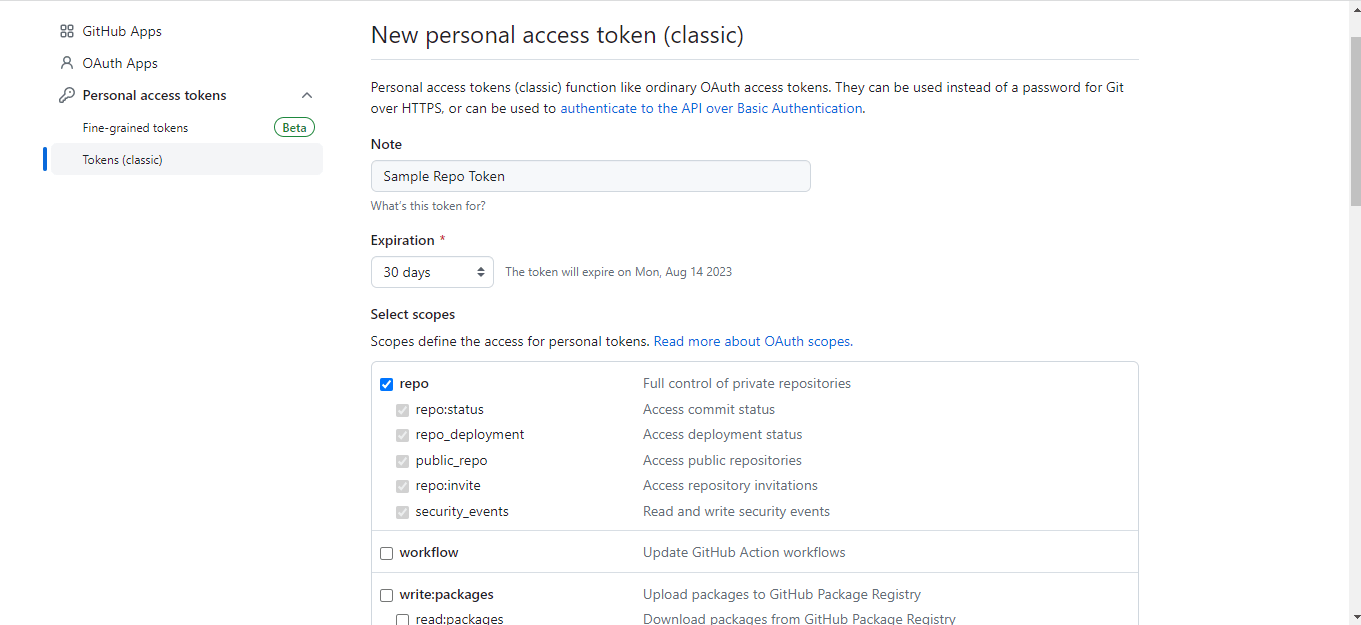
Finally, Here we get our personal access token.

Using a Personal Access Token
After creating a Personal Access Token, you can use it as a substitute for your password when prompted for authentication on the GitHub website or through the Command Line Interface (CLI). Although GitHub may specifically ask for a “password,” you can typically enter your token instead.
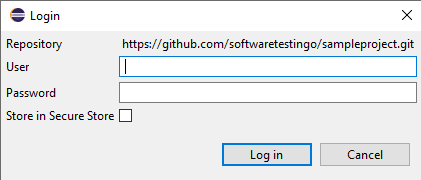
It’s important to remember that your token will only work if you have configured it with the appropriate scope, granting you the necessary permissions to access the desired resources or perform specific actions. Depending on your goal, your token may act as an alternative to a password or may not be applicable.
Keep in mind that web browsers often store login information, so you might need to clear your browser’s cache to use your token. Otherwise, GitHub might continue using the cached password-based login and not prompt you for your token.
